1. Led always on
Mount the following electrical schematic on a breadboard.
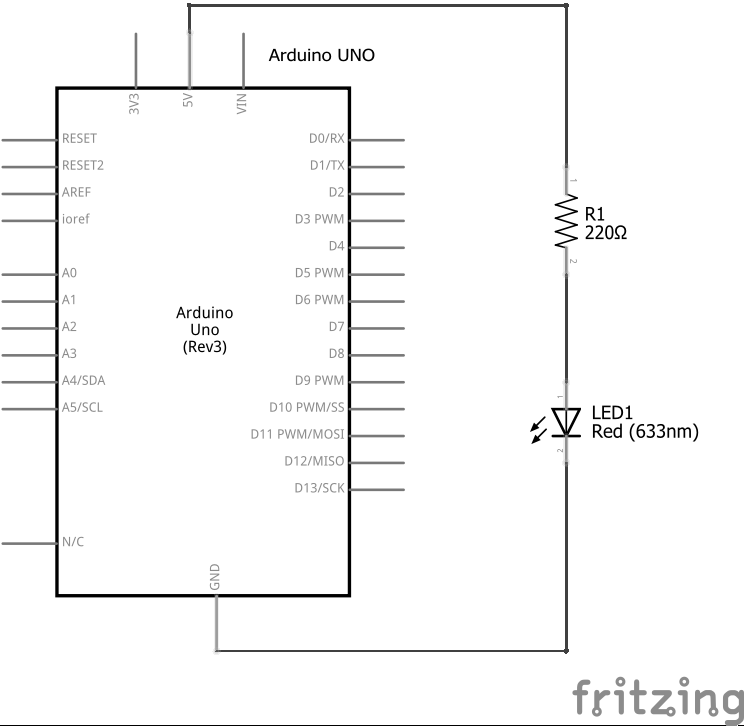
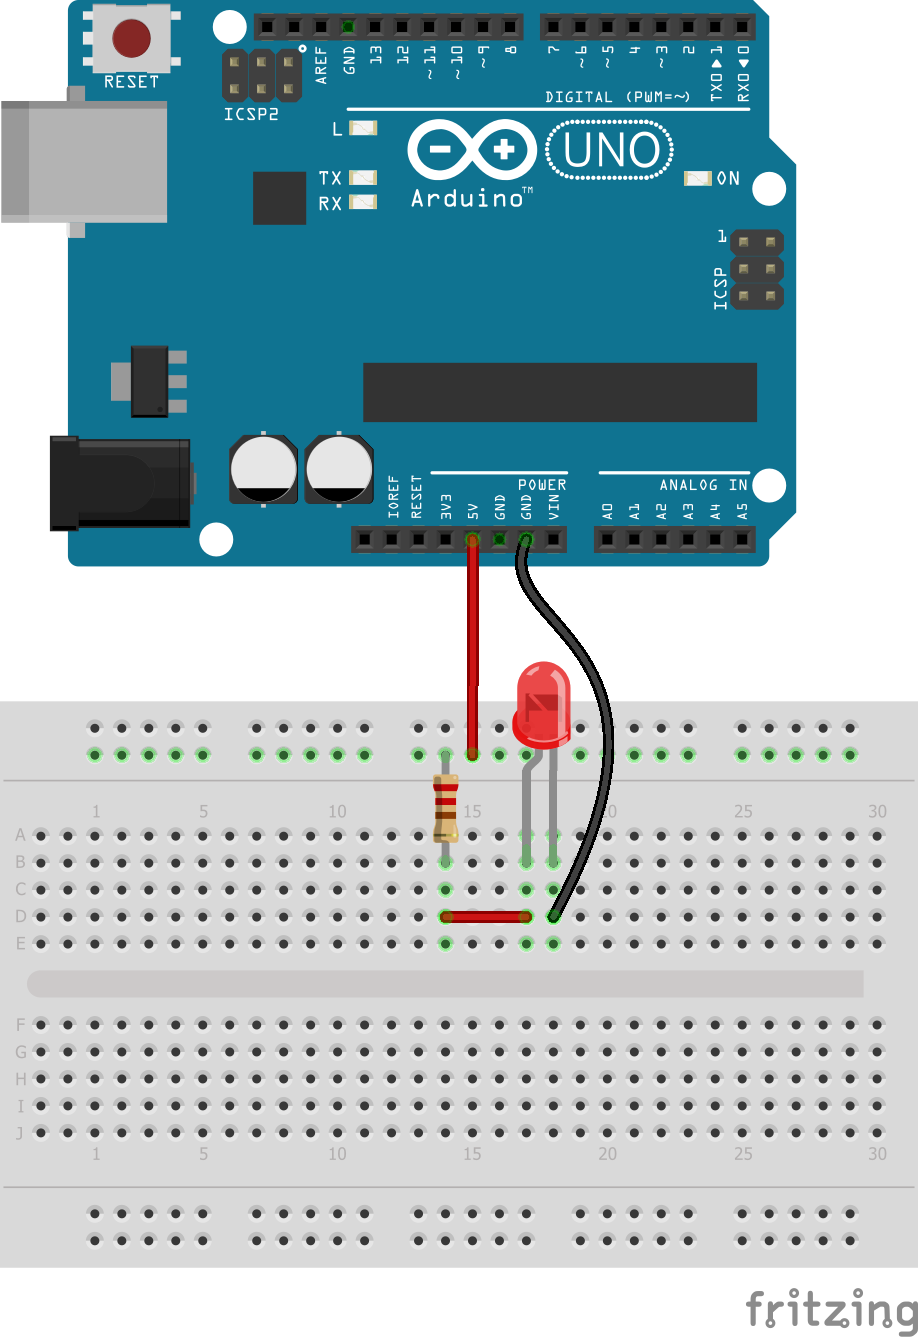
The red led should always stay on when the Arduino Uno board is powered.
Electrical circuit in Fritzing format
Exercises
Change the direction of the led so that the pins are connected backwards. You can check that the led turns off when it is connected backwards. Being a diode, it only allows the passage of electricity in one direction and does not allow it in the opposite direction.
If at any time a led does not work, check that it is connected in the correct direction.
Change the 220 Ohm resistor for another 1000 Ohm resistor. You will see that the luminosity of the led decreases.
Change the 220 Ohm resistor for another 150 Ohm resistor. You will see that the luminosity of the led increases.
The resistor that accompanies the led serves to limit the current that circulates. In this way, the led or the output of the Arduino board is prevented from burning.