4. Pieces size
In this tutorial we are going to learn how to change the size of the simple pieces to form a different piece from the standard pieces.
Open the FreeCAD application and click on the icon to create a new document
 .
.A new tab will open with an empty document, where we can start designing.
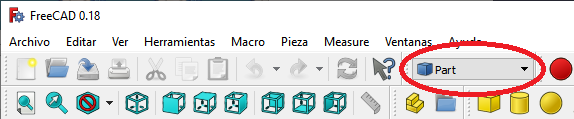
We select the Part workbench to start designing objects in 3 dimensions.
At this point we are going to add the reference axes to help us place the pieces correctly.
In the menu
View... Activate or deactivate the cross of the axes.In English
View... Toggle axis cross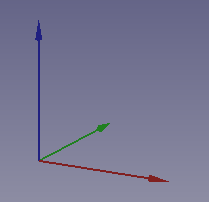
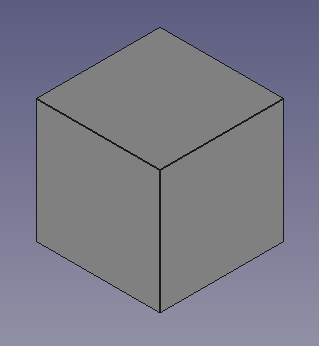
Now we create a cube by clicking the first icon on the solid object bar.

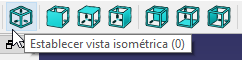
We select to see the piece in isometric view.
The piece will look like the following image.
We select the cube and in the Data tab we open the Box menu where we will see the Length, Width and Height of the cube (Length, Width, Height).
In this menu we can modify the size of the cube in the x, y, z axes.
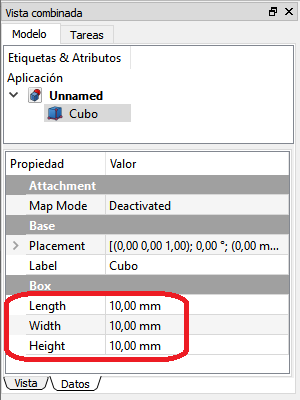
Cube sizes can be changed by typing in a new number or by clicking on the number and rolling the mouse wheel.
By moving the mouse wheel you can see how the cube changes in size on the screen.
Exercises
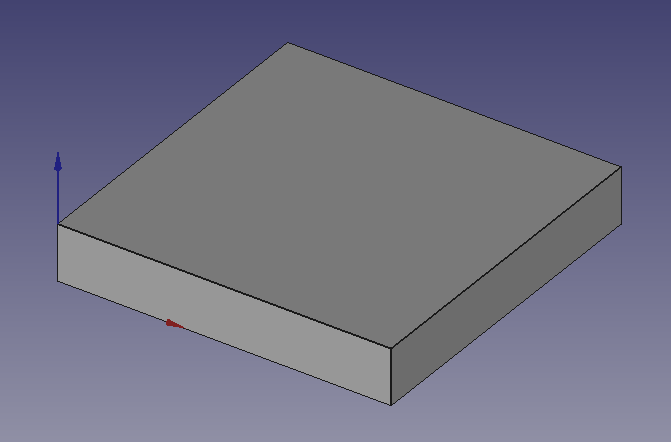
Open FreeCAD and create a new document with a cube. Modify the cube to have the following sizes.
Length (Length) = 30
Width = 30
Height = 5
The result will be the same as the following figure.
Open FreeCAD and create several cubes with a Height of 10, 20 or 30 millimeters as appropriate.
Translate the cubes (in the Data tab... Placement... Position) to create the following figure.
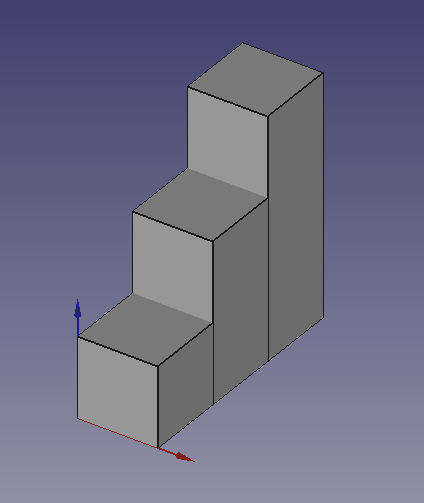
Remember that you need to select a cube before you can move it around the screen.
Modify the Length (Length) of the previous pieces to form a wider staircase, 30 millimeters, according to the following figure.

Create three pieces of Length (Length) and Width (Width) increasing each time.
Move the smaller pieces up to make the following figure.
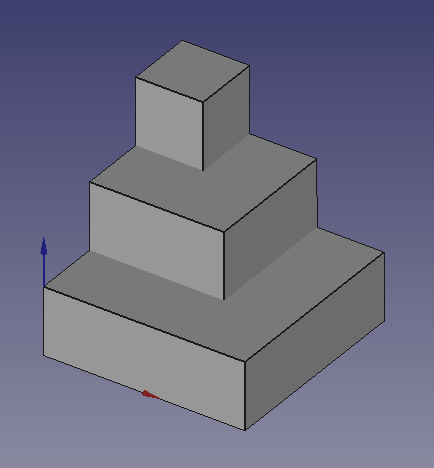
The positions and sizes will be as follows.
Cube: x=0, y=0, z=0, Length=30, Width=30, Height=10
Cube 001: x=0, y=10, z=10, Length=20, Width=20, Height=10
Cube 002: x=0, y=20, z=20, Length=10, Width=10, Height=10
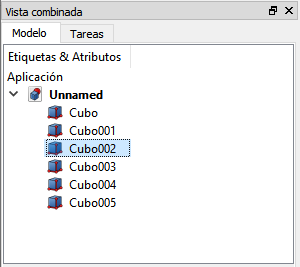
Create the following figure by changing the size and position of five cubes.
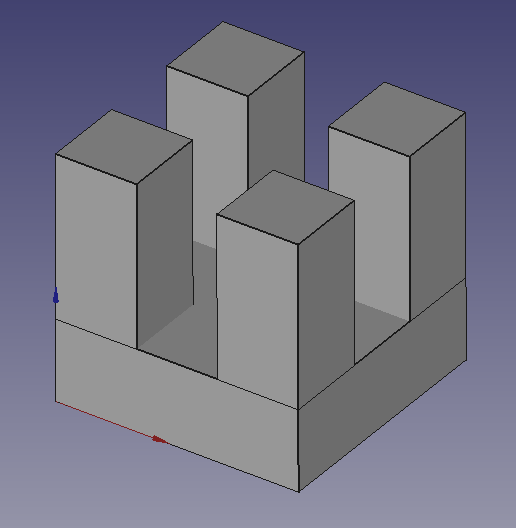
The positions and sizes will be as follows.
Cube: x=0, y=0, z=0, Length=30, Width=30, Height=10
Cube 001: x=0, y=0, z=10, Length=10, Width=10, Height=20
Cube 002: x=0, y=20, z=10, Length=10, Width=10, Height=20
Cube003: x=20, y=0, z=10, Length=10, Width=10, Height=20
Cube 004: x=20, y=20, z=10, Length=10, Width=10, Height=20
Create the following figure by changing the size and position of several cubes.
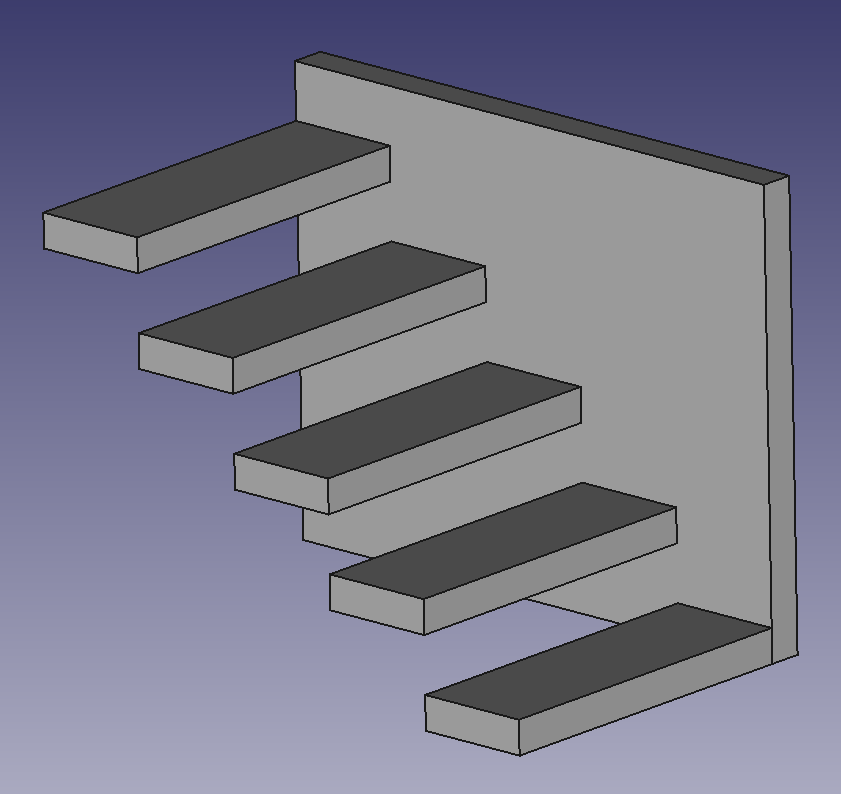
- Pistas:
- El tamaño de los peldaños es de 3 x 10 x 30 mm.
- La altura de cada peldaño es de 8 mm más que el anterior.