5. Nike logo
We open a new document with Inkscape.
We copied the Nike logo into the new document to serve as a model.
With the tool to draw curves and lines
 We draw a polygon with four points as shown in the image.
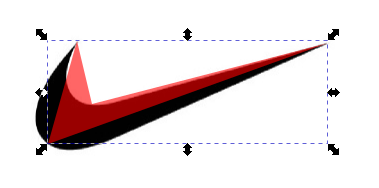
In the
Object... Fill and Stroke...menu we will change the fill color to red with transparency at 60 and no border. This way we will be able to see the two figures at the same time while we work with the vector design.To continue we select the node editing tool
 , select the central nodes and smooth the nodes with the button on the top bar
  .
.The nodes will now show two handles each and the figure will have curved around them.
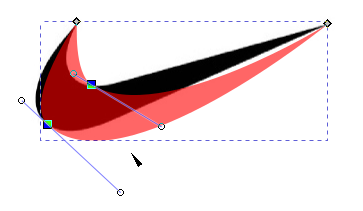
Now we will only have to move the round handles of each node so that the curves of the two figures coincide.
It may be necessary during adjustment to move the nodes themselves to a more advantageous position. Little by little the figures will become more and more similar.
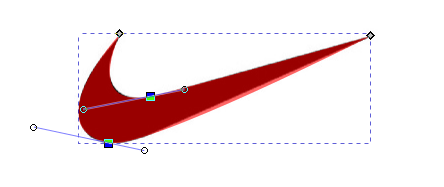
Once our vector shape matches the logo, with the
 we will move the new design to be able to delete the logo in bitmap image.
Now we change the drawing from red to black without transparency, with which the design will be finished.