6. Citroen logo
We open a new document with Inkscape.
With the tool to draw squares and rectangles
 we draw a square and change its dimensions to 70 by 70 millimeters in the upper bar. The Citroën logo is not exactly square, but the result we get is a very close approximation of the original.
In the
Object... Fill and Stroke...menu we change the RGB fill values to 185 Red, 38 Green and 30 Blue.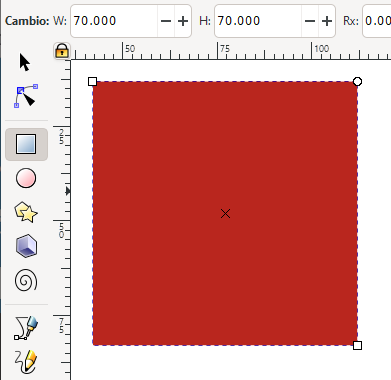
With the tool to draw lines and curves
 we draw two points as in the image. For now we do not worry about the precision of the points, later we will be able to place them better.
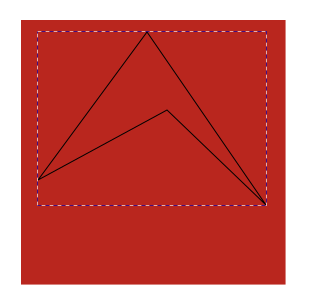
Now we will use the node editing tool
 to align the nodes with each other.
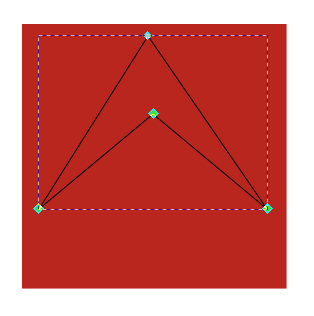
We select the nodes 2 and 4 and in the menu
Object... Align and distribute...we click on align selected nodes to a common horizontal line.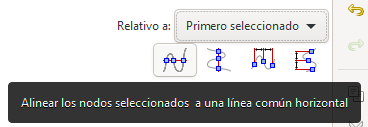
Now we select the nodes 2, 3 and 4 and in the menu
Object... Align and distribute...we click on distribute the selected nodes horizontally.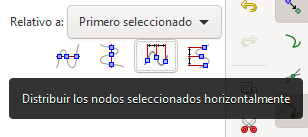
The nodes can be selected by clicking on each one of them while pressing the uppercase key
 .
.Nodes 2, 3 and 4 will be uniformly distributed.
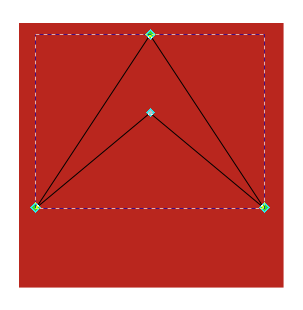
To end this section, we select nodes 1, 2 and 4 and redistribute them horizontally.
The nodes can be selected by clicking on each one of them while pressing the uppercase key
.The result will be the following.
To finish placing the nodes, we will move node 3 up while pressing the control key
 to prevent it from moving horizontally.
Finished placing nodes, we can choose the select tool
 to modify the outer size and position of the drawing.
Once finished, from the
Object... Align and distribute...menu we will place the drawing in the center of the square.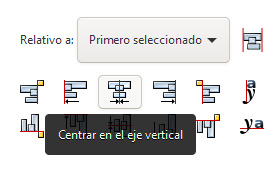
All that remains is to change the fill color to white with the
Object... Fill and border...menu and remove the stroke color.
Now we select and duplicate the white shape and move it down by pressing the control key to make sure it doesn't move horizontally.

To finish we will select the two white shapes and group them with the
Object... Groupmenu.Once grouped, we can select all the drawings and vertically center the white figures, to finish the logo.
