17. Cube logo
We open a new document with Inkscape.
If we analyze the logo at the beginning of this page, we can see that all the lines of the cube in perspective are concentrated in three different points.
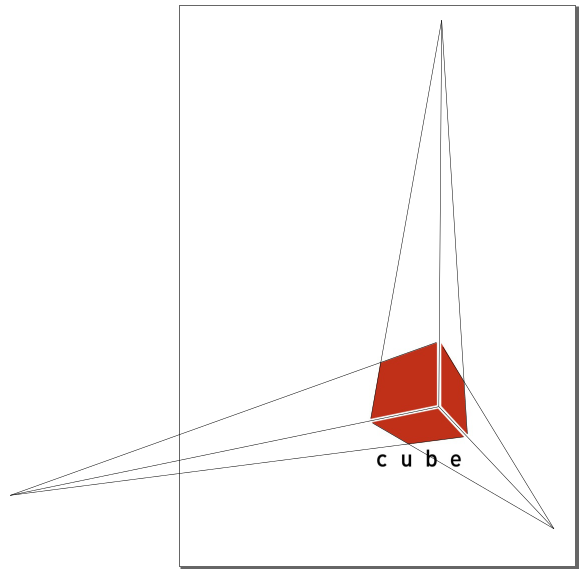
This type of perspective is called conical and in it all the horizontal lines or all the vertical lines are directed towards a point called the vanishing point.
To represent this figure we will use the tool to draw cubes in perspective
 .
.First we make sure that there are three nearby vanishing points by deselecting the parallel lines in all three axes.

Next we draw the cube, moving the vanishing points as shown in the image.
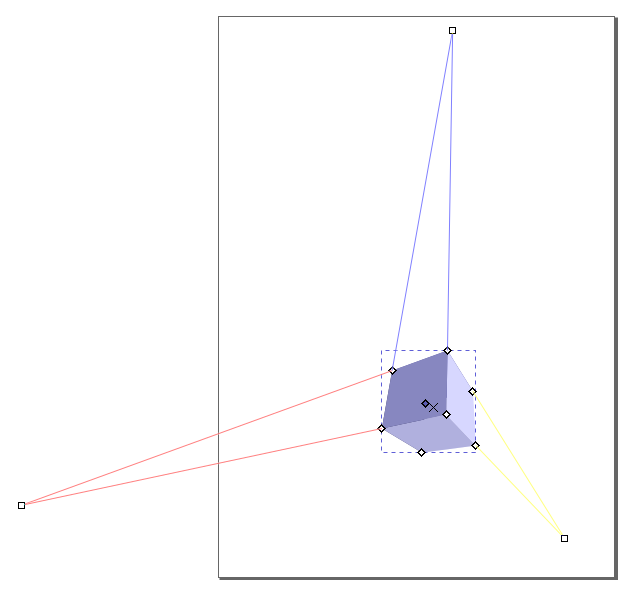
You can copy the above image into Inkscape to use as a template for drawing the cube.
To continue, we ungroup the cube elements in perspective. First we select the cube and then in the menu
Object... Ungroup.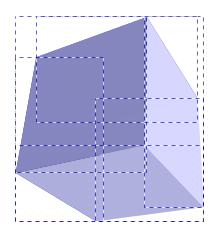
We find the six faces of the cube, so we will have to separate them from each other and delete the back faces.


We rejoin the three front faces and reduce their size by selecting them one by one and applying the
Path... Reducemenu tool.

Now we change the color of the faces of the cube to the orange color of the original cube.

Finally, we added the word Cube with a 36-point Arial font and a 20-point space between letters.
And the logo will be finished.