9. Character format II
In this exercise we continue modifying the text format with the advanced options of the Character Format menu. In this menu we can change many more format options than are available in the buttons on the format bar.
To give the necessary format to the text we are going to use the menu
Format... Character...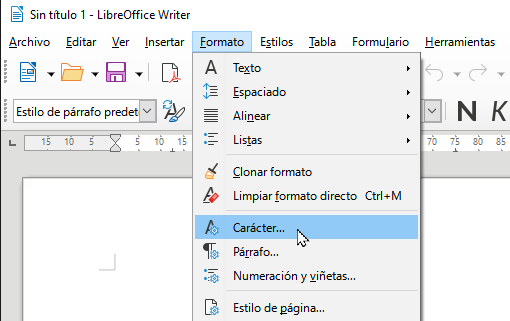
In the Font Type tab, the following window will appear.

In this window you can choose a font, a style and a size. This tool is the same as the format buttons that we have already used, with the advantage that we can now see the chosen format in the lower box.
Another tab in the window is Typographic Effects.
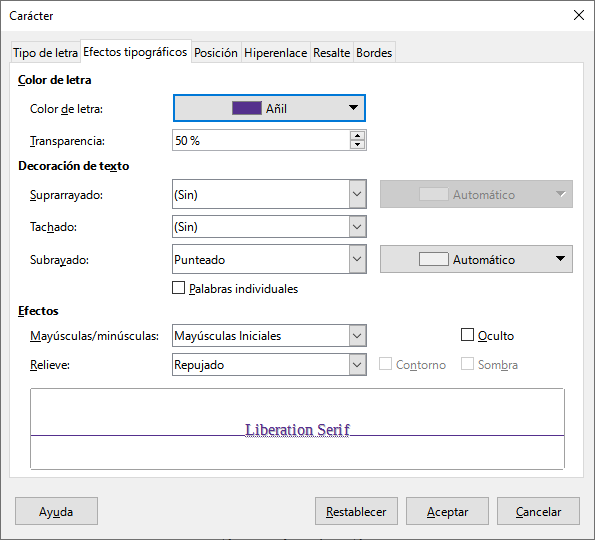
In this window we can select the color of the written text adding the option to establish the transparency of the text.
Another option for underlining is the desired underline style or even strikethrough or overline.
As we can see, the options are much more complete than the ones we have in the formatting toolbar.
Now we download and open the example document with LibreOffice Writer.
When opening the previous file we will find the following plain text.
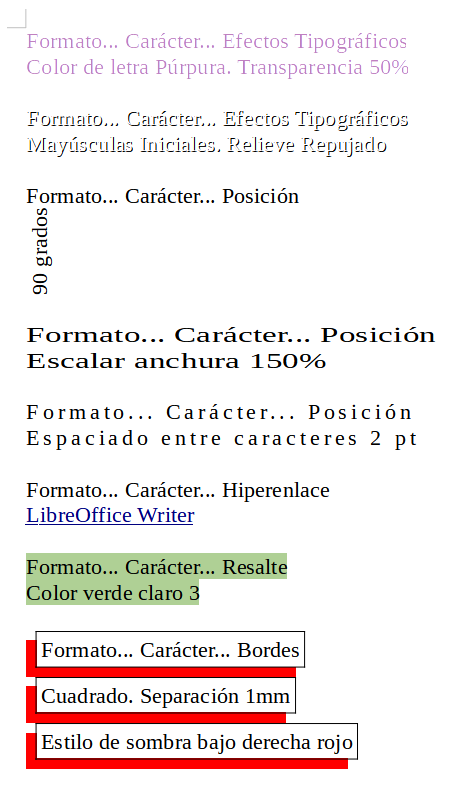
The exercise consists of formatting each paragraph of the text to match the instructions that can be read in the following image. This image represents the final result of the exercise.
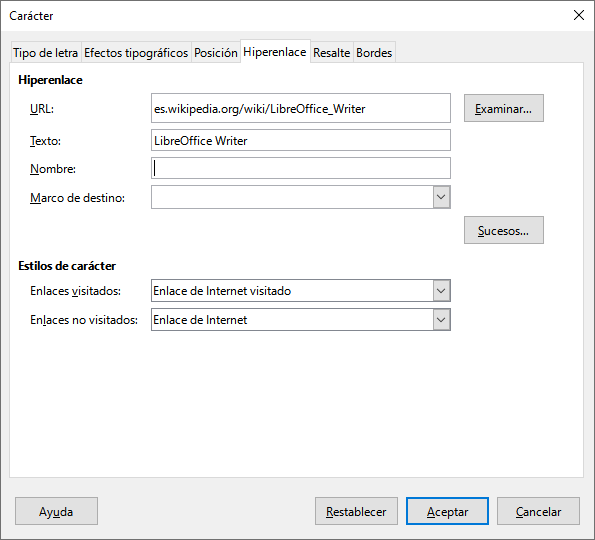
To create a hyperlink to a web page we must write the web address in the URL box.
es.wikipedia.org/wiki/LibreOffice_Writer