22. Tables I
In this exercise we will see how to insert tables in a LibreOffice Writer document and how to format the table cells.
First we open a new document with LibreOffice Writer
Next we will create a table. In the menu
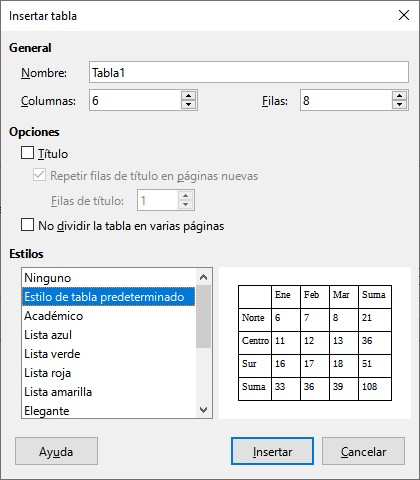
Table... Insert table...we fill the dialog box with the following values.Columns = 6
Rows = 8
Styles = Default table style.
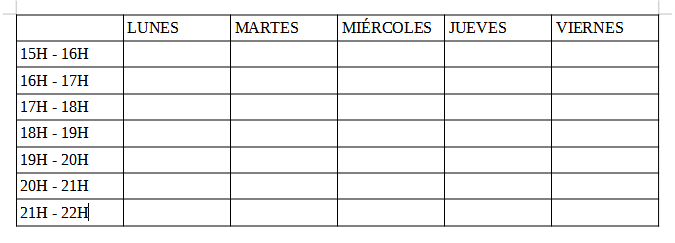
When finished, click on the Insert button and we will obtain a table like the one in the following figure.

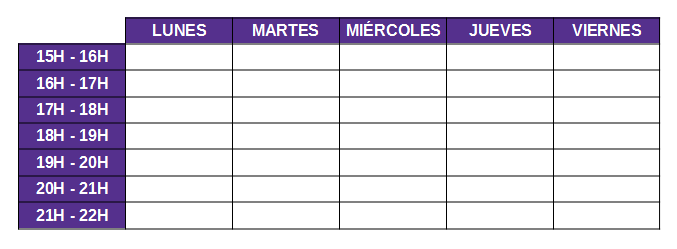
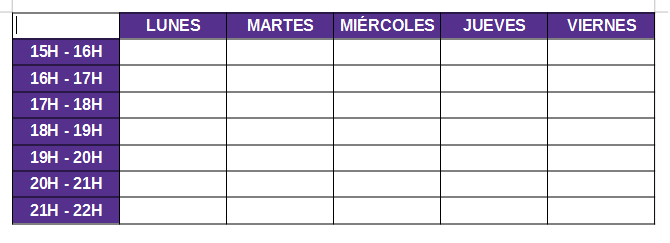
Now we will fill in the table with the following data that will help us to design an afternoon schedule.
Once we have the table with the data we are going to format the text. Select all the cells above by clicking on the MONDAY cell and dragging to the FRIDAY cell.
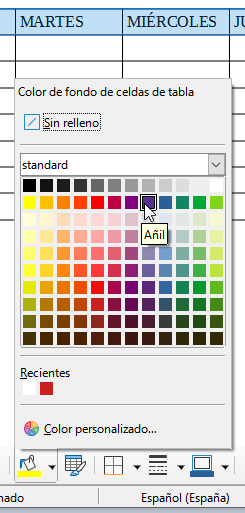
Now with the Table cell background color button we change the background color to Indigo.
We can also change the background color of the cells in the
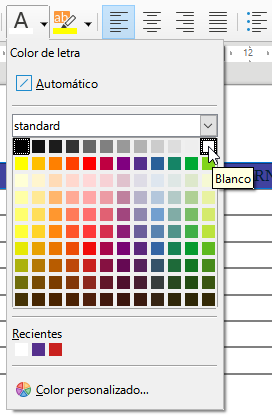
Table... Properties...menu in the Background tab.Now with the Font Color button we will change the color of the text to White
Finally we will center the text with the button
 . and we will change the font to Liberation Sans with Bold style. We can do this with the buttons in the tool table or with the
 Format... Character...menu.Click on the first cell and the result will be the following.

Then we repeat the same steps above to change the format of the cells on the left.
To finish we will select the first cell by placing the cursor on it and with the menu
Table... Select... Cell.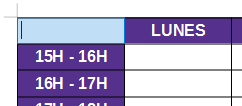
Once the first cell is selected, we choose in the menu
Table... Properties...in the Border tab, clicking with the mouse will remove the left and upper borders, while we will keep the right and lower borders.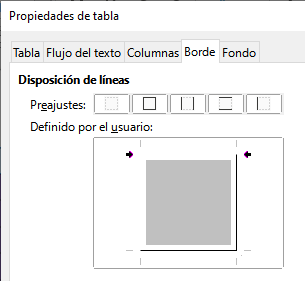
Now we can see with the print view button
 how our table will look when printed.